Code Overlord Desktop: Getting Started
On this page
- What You Can Do
- Installation
- System Requirements
- Linux .deb
- macOS .dmg
- Windows .msi Or Setup Installer
- First Launch
- First-Run Onboarding
- Welcome And Workspace Picker
- Guided Product Tour
- 1. Thy War Table
- 2. The Proving Ground
- 3. Thy Quill
- 4. Three Banners
- 5. Advanced Engines
- 6. Summon To Begin
- Main Window Anatomy
- Initial Configuration
- 1. Open A Focused Workspace
- 2. Sign In
- 3. Verify Agents
- 4. Configure Alliances And Integrations
- 5. Know Where App State Lives
- Troubleshooting First Launch
Code Overlord is a native desktop development environment for terminal-first work. It brings agent terminals, Git review, file browsing, task automation, notepad planning, and cloud/integration controls into one dark-themed app.
The app uses themed names. This guide keeps the names you see on screen and explains them in plain language the first time they appear: Grunts are raw agent CLIs such as Claude Code or Codex, Minions are role-based trained agents, Rituals are scheduled prompts, Peruse is the open-file area, Scrolls are workspace files, Thy Quill is the notepad, Command is the work/terminal view, Control is the Git review view, Chronicle is history, Armoury is settings, and Skyforge is the remote compute environment.
What You Can Do
- Summon agents and shell tasks into integrated terminal tabs.
- Review multi-repo Git status, diffs, staging, commits, branches, fetch, pull, and push.
- Browse workspace files and keep frequently opened files in Peruse.
- Capture plans and notes in Thy Quill, the persistent right-side notepad.
- Connect accounts and MCP tools such as Google, Slack, Jira, GitHub, OTRS, browser automation, and more.
- Resume previous agent sessions from Chronicle when resume data is available.
Installation
System Requirements
Code Overlord is built for:
| Platform | Supported package | Notes |
|---|---|---|
| Linux | .deb |
Debian/Ubuntu-style packaging is present. |
| macOS | .dmg |
The packaging flow creates a signed app bundle inside a disk image when signing inputs are supplied. |
| Windows | .msi or setup installer |
The repo contains WiX MSI metadata and also an Inno Setup CodeOverlord-Setup-*.exe installer path. Use the installer your download page or administrator provides. |
You need:
- Git for repository operations.
- Node.js and
npxfor some agent/browser tooling. - Playwright Chromium for browser automation.
- A network connection for sign-in, mobile pairing links, agent installation, cloud sync, and update checks.
On Windows, the current installer script bundles Git for Windows when missing, portable Node.js 22, Playwright Chromium, and common AI coding agents. On Linux and macOS, make sure Git and Node.js are on your PATH unless your packaged build includes them.
Linux .deb
Download the
code-overlord_<version>_amd64.debpackage.Install it with your graphical package manager, or run:
sudo apt install ./code-overlord_<version>_amd64.debLaunch Code Overlord from your application menu, or run:
code-overlord
The package installs the code-overlord executable, a desktop entry, icons, browser bridge assets, and package hooks that refresh desktop/icon caches.
Tip: If your package manager reports missing dependencies, use
sudo apt -f installand then launch Code Overlord again.
macOS .dmg
- Download the
Code Overlord-<version>.dmgdisk image. - Open the disk image.
- Drag Code Overlord into Applications.
- Launch it from Applications or Spotlight.
- If macOS Gatekeeper asks for confirmation, approve the app from the system prompt or from System Settings -> Privacy & Security.
The macOS package is an app bundle. It can also register the codeoverlord:// URL scheme for OAuth and environment-bootstrap callbacks.
Windows .msi Or Setup Installer
- Download the Windows installer supplied for your release. It may be an
.msi, or it may be the repo's current Inno Setup package named likeCodeOverlord-Setup-<version>.exe. - Run the installer.
- Accept the default install location unless your team uses a managed path.
- Leave the dependency setup enabled. The current setup flow installs or configures Git for Windows, portable Node.js, Playwright Chromium, and bundled agent tools.
- Launch Code Overlord from the Start menu or the desktop shortcut if you selected one.
The Windows installer targets x64-compatible Windows 10 version 1909 or later and Windows 11.
First Launch
Code Overlord can start in three ways:
- With no workspace: you see first-run onboarding, then the welcome screen.
- With a folder: Code Overlord opens or creates a
.code-workspacefile for that folder. - With a
.code-workspacefile: that workspace opens directly.
First-Run Onboarding
The first-run modal is titled Code Overlord Onboarding. It is shown once per config directory and tracked in onboarding_state.json.
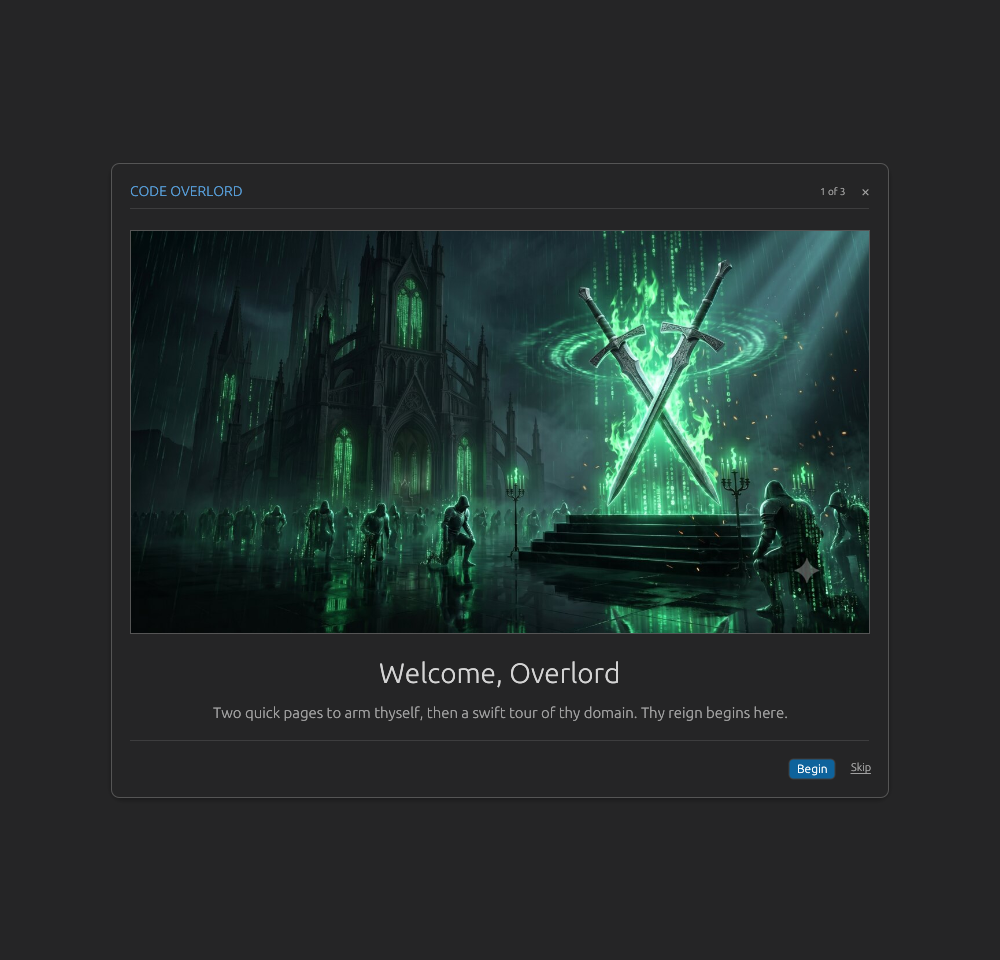 The opening onboarding slide.
 Begin advances; Skip closes onboarding.
The welcome slide introduces the product tour. Use:
Beginto continue.Skipor the close button to dismiss onboarding.Backon later slides to return to the previous slide.
The Phone Sync slide helps pair the desktop app with the Android or iPhone app. Phone Sync means mobile pairing: after you sign in, you can open a QR/link flow and connect the same account on your phone.
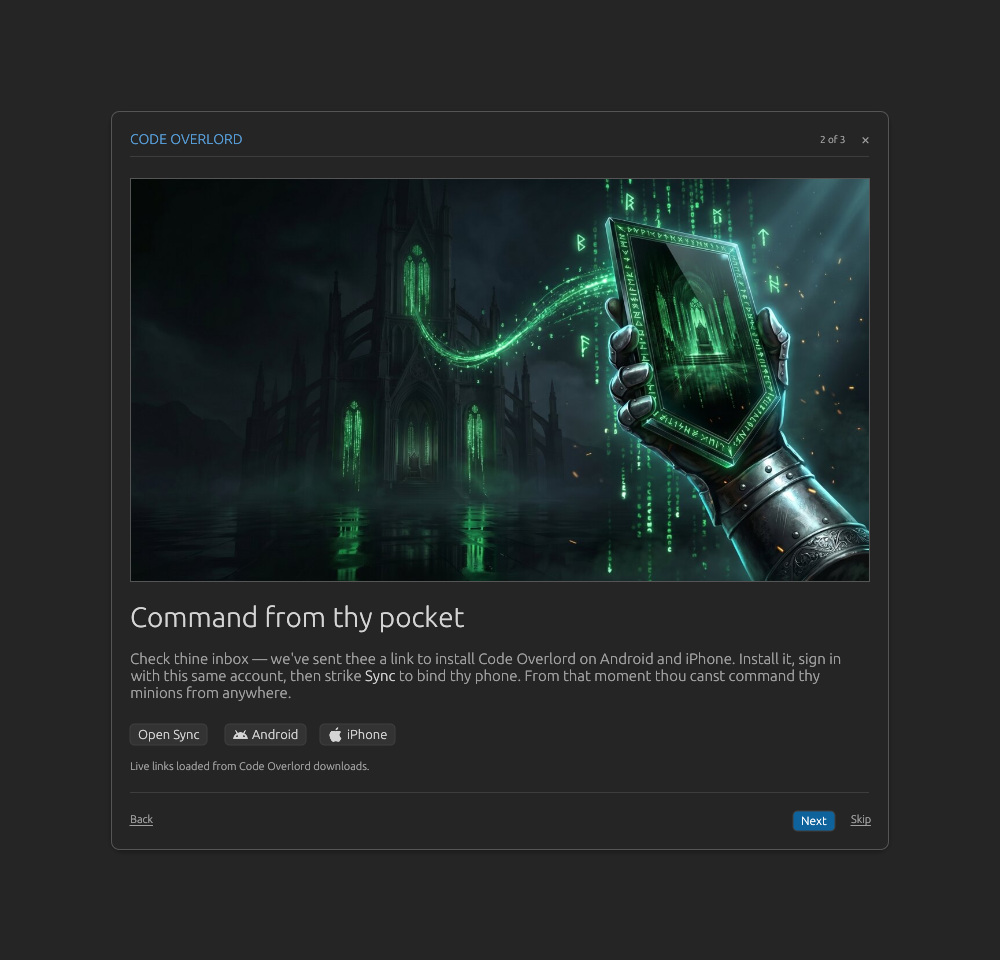 The Phone Sync slide.
 Open Sync, Android, and iPhone become useful after sign-in and download links are available.
On this slide:
Open Syncopens the pairing QR flow when you are signed in.Androidopens the Android beta/install flow. Android may ask for the Google account used on the phone.iPhoneopens the iPhone/TestFlight install flow when an iPhone link has loaded.- If you are not signed in, the controls explain that sign-in is required.
The Alliances slide points you to account setup. Alliances are connected accounts that Minions can use, such as Google, Slack, and Jira.
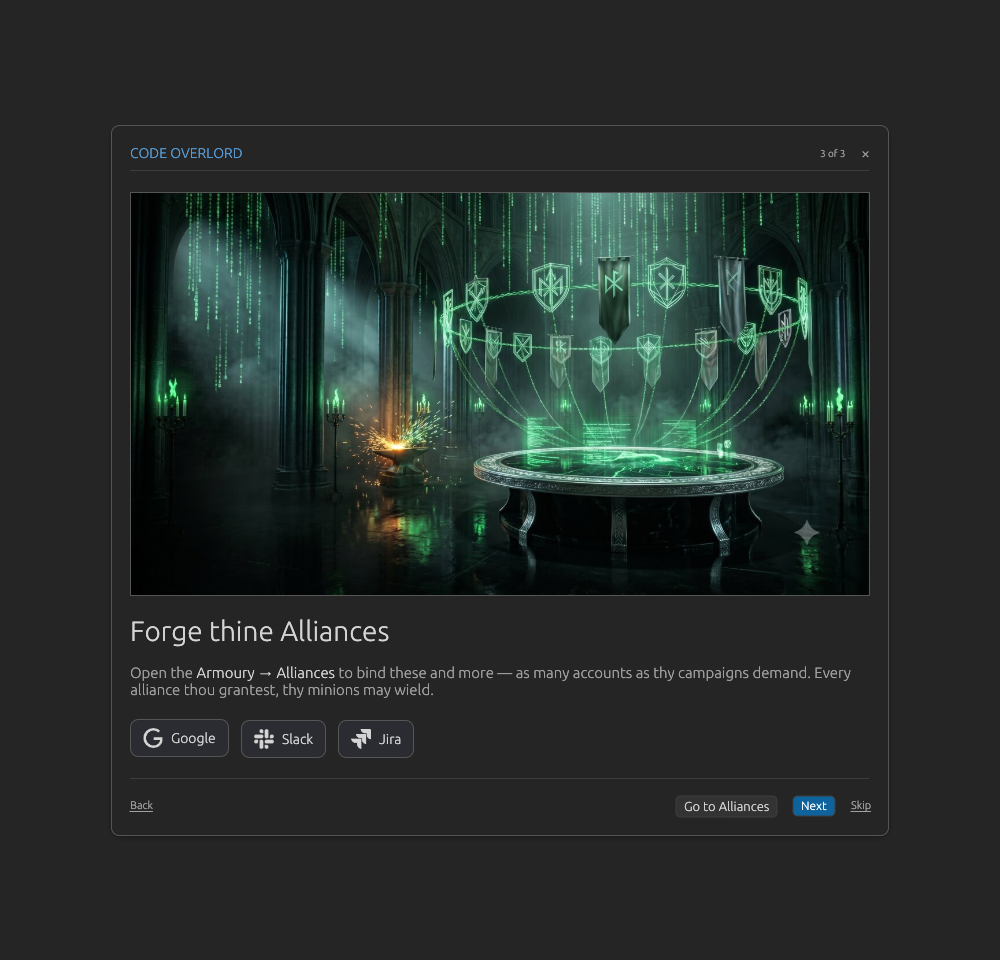 The Alliances slide.
 Go to Alliances opens the Armoury account-binding surface.
Use Go to Alliances if you want to bind accounts immediately. Use Next on the final slide to close onboarding and start the guided product tour. Use Skip if you want to reach the welcome/workspace picker without the tour.
Welcome And Workspace Picker
When no workspace is open, Code Overlord shows the welcome screen. The current source labels the main call to action OPEN STRONGHOLD; older screenshots or builds may call the same action Open Workspace.
You can:
- Click
OPEN STRONGHOLDto pick a folder. - Pick a recent workspace under
PAST CONQUESTS. - Drag a folder into the window.
- Drag a
.code-workspacefile into the window. - Close the window from the top-right
X.
Folder handling is automatic:
- If the folder contains no
.code-workspacefile, Code Overlord creates one and opens it. - If the folder contains exactly one
.code-workspacefile, Code Overlord opens it. - If the folder contains multiple
.code-workspacefiles, Code Overlord showsSelect Workspaceand asks which one to open. - If the folder cannot be read, the app reports a permission/read error instead of creating a new workspace blindly.
When a workspace opens, Code Overlord loads the workspace file, remembers it in recents, restores saved agent/file tabs, starts repository discovery, loads scheduled tasks, opens the notepad, starts file indexing, and refreshes Git status.
Guided Product Tour
The guided tour is a six-step spotlight overlay. It skips a step if the target is not visible, and it can be dismissed with Skip or Esc.
1. Thy War Table
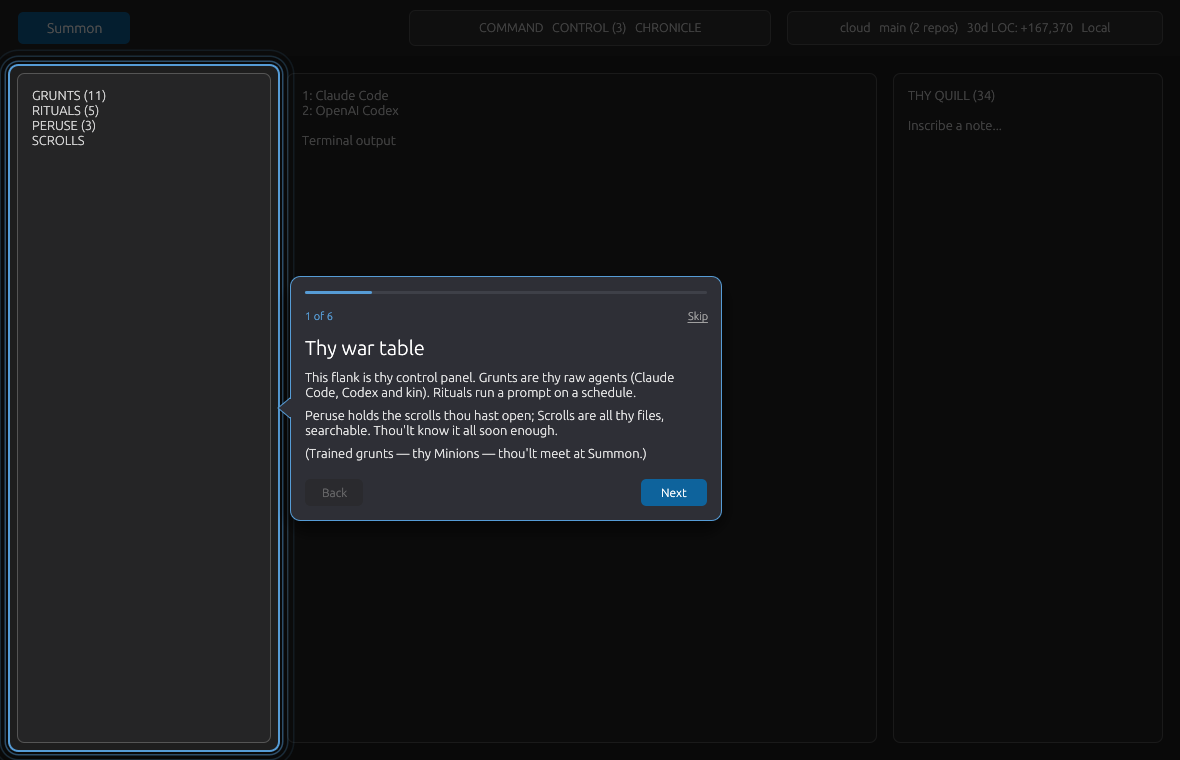 The left sidebar is the control panel for agents, scheduled prompts, open files, and workspace files.
The left sidebar changes by view. In Command it contains:
- Grunts: raw agent CLIs such as Claude Code, Codex, Antigravity CLI, and Cursor.
- Rituals: scheduled prompts and recurring runs.
- Peruse: files you have opened.
- Scrolls: the searchable workspace file tree.
In Control, the left side becomes the Git review/repository area. In Chronicle, it becomes history navigation.
2. The Proving Ground
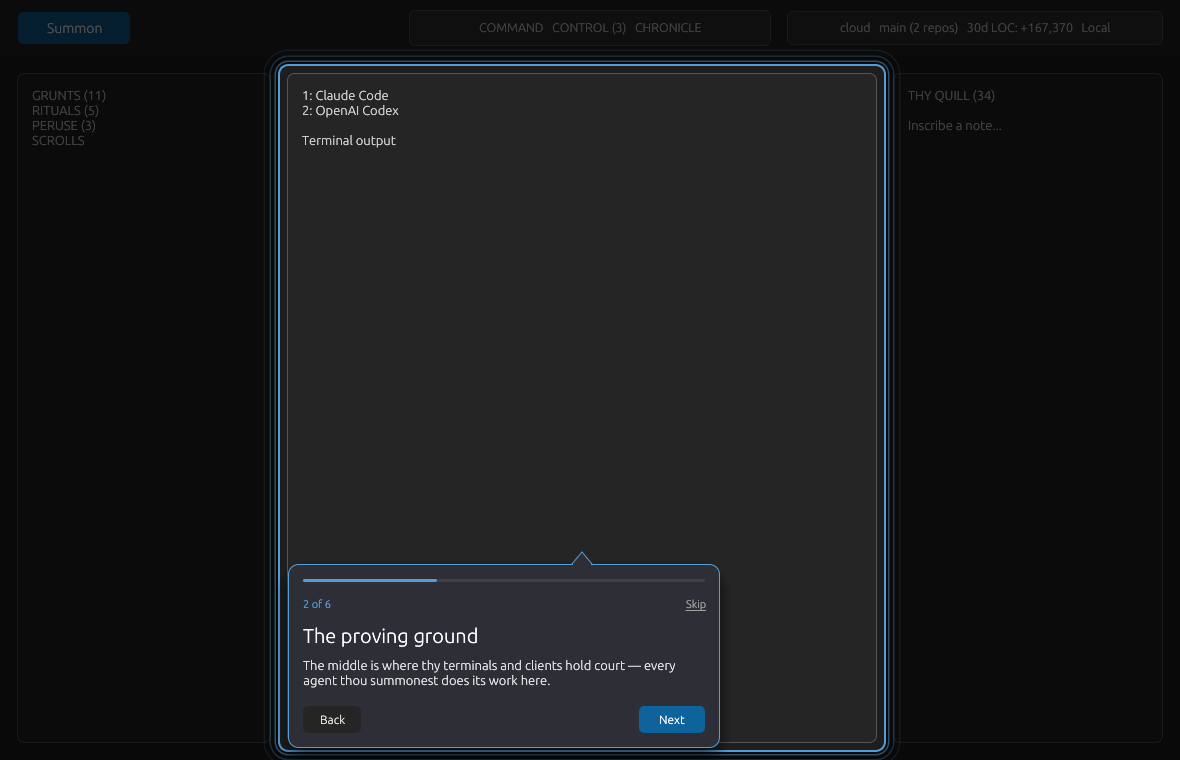 The center area is where terminal sessions, agent output, file previews, diffs, and history viewers appear.
The center of the app is the main work area. In Command, agent and shell terminals run here. In Control, this area shows diffs and review tools. In Chronicle, it shows commit, file, and session history.
3. Thy Quill
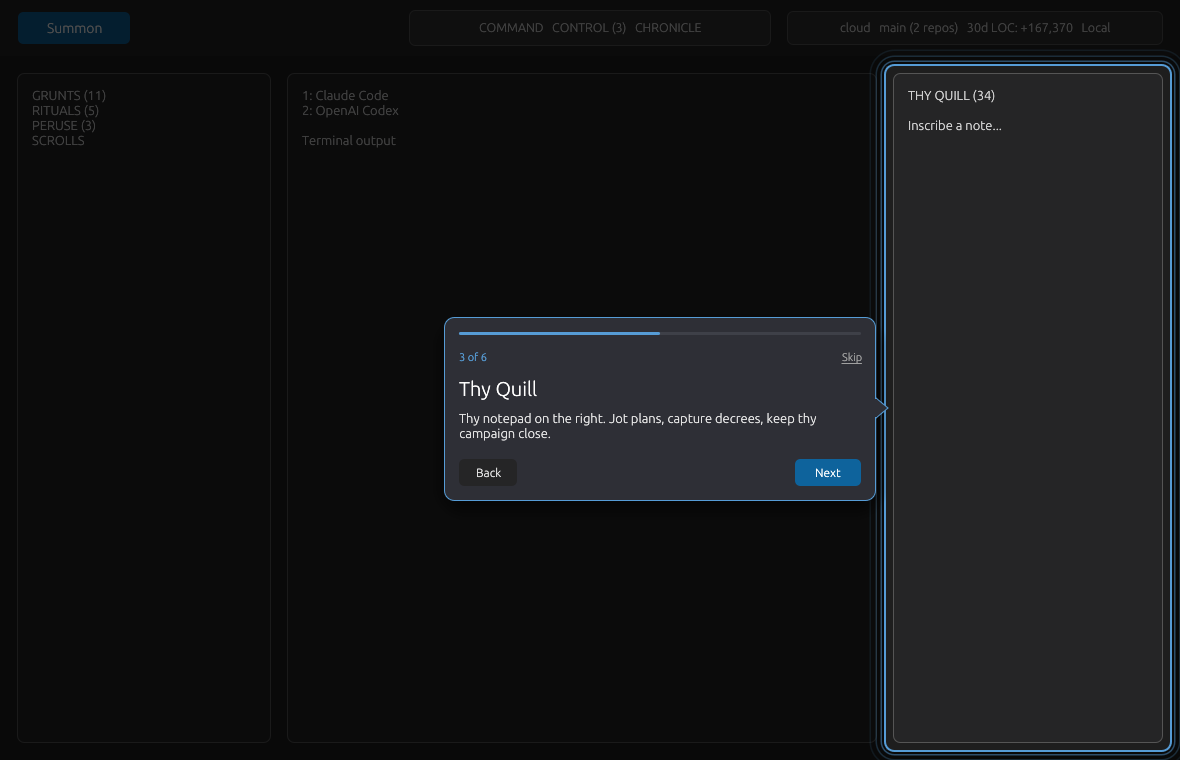 Thy Quill is the persistent right-side notepad for plans, notes, and working context.
Thy Quill stays on the right as a campaign notebook. Use it for short plans, handoff notes, links to files, and reminders you want near your terminals.
4. Three Banners
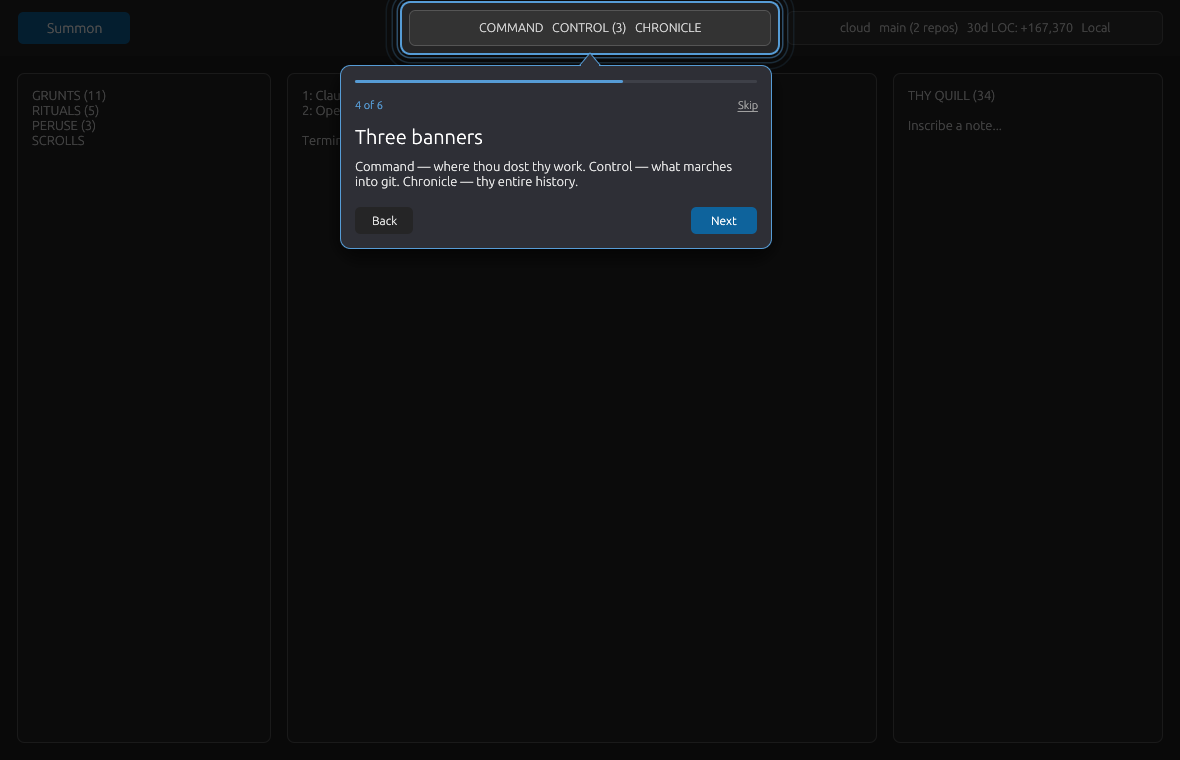 The top-center tabs switch between Command, Control, and Chronicle.
The three main views are:
COMMAND: agent terminals, tasks, files, scheduled runs, and settings entry points.CONTROL: Git review, staging, diffs, commits, branches, fetch, pull, and push.CHRONICLE: Git history, file history, and previous sessions.
5. Advanced Engines
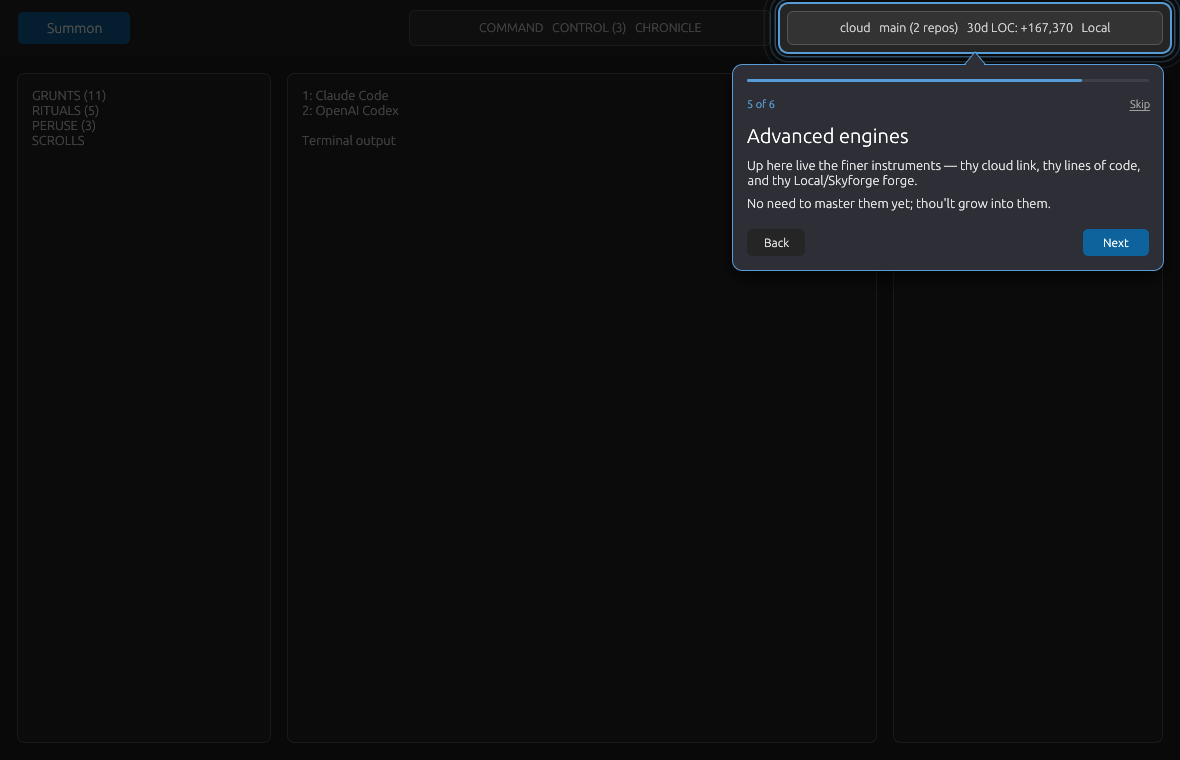 Status chips summarize cloud sync, codebase size, and whether work is local or on Skyforge.
The top-right status chips show higher-level state such as cloud connection, update availability, line counts, branch health, background Git activity, and the Local/Skyforge compute target.
6. Summon To Begin
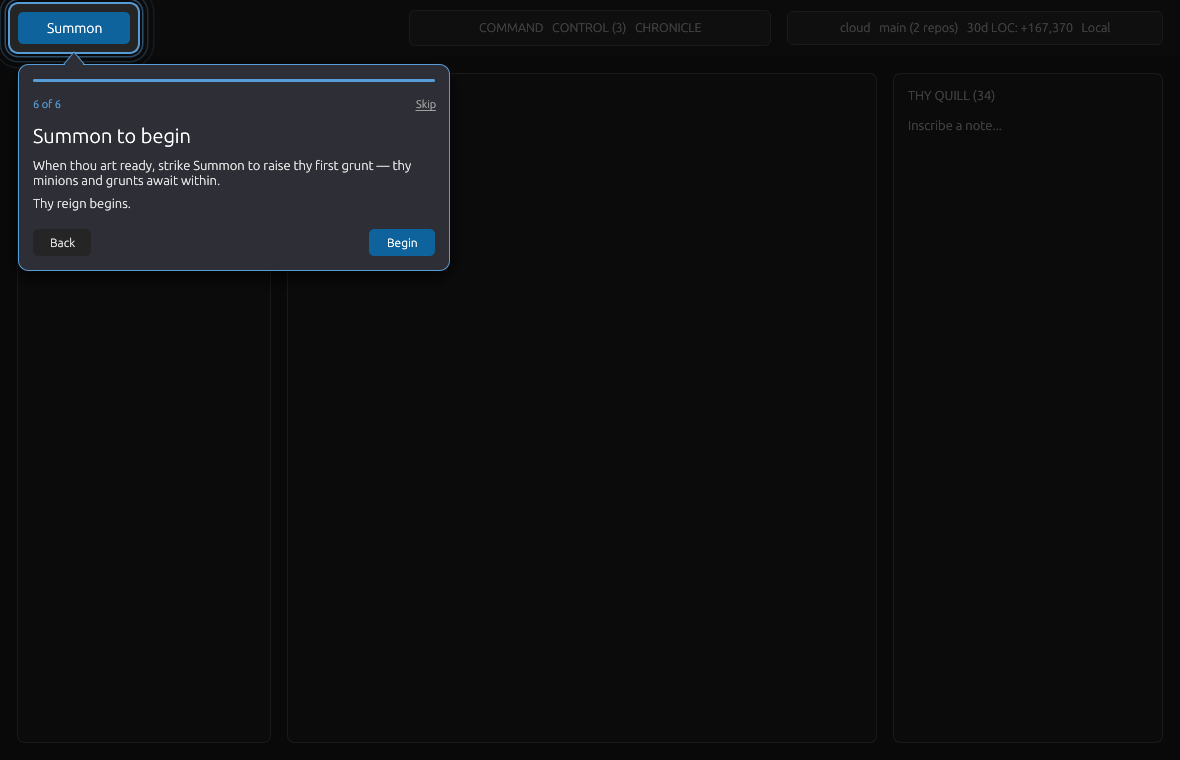 Use
Use Summon to open the agent and action picker.
Summon opens the picker for Grunts, Minions, tasks, settings, and other launchable actions. If the picker is already open, the button changes to Close.
Main Window Anatomy
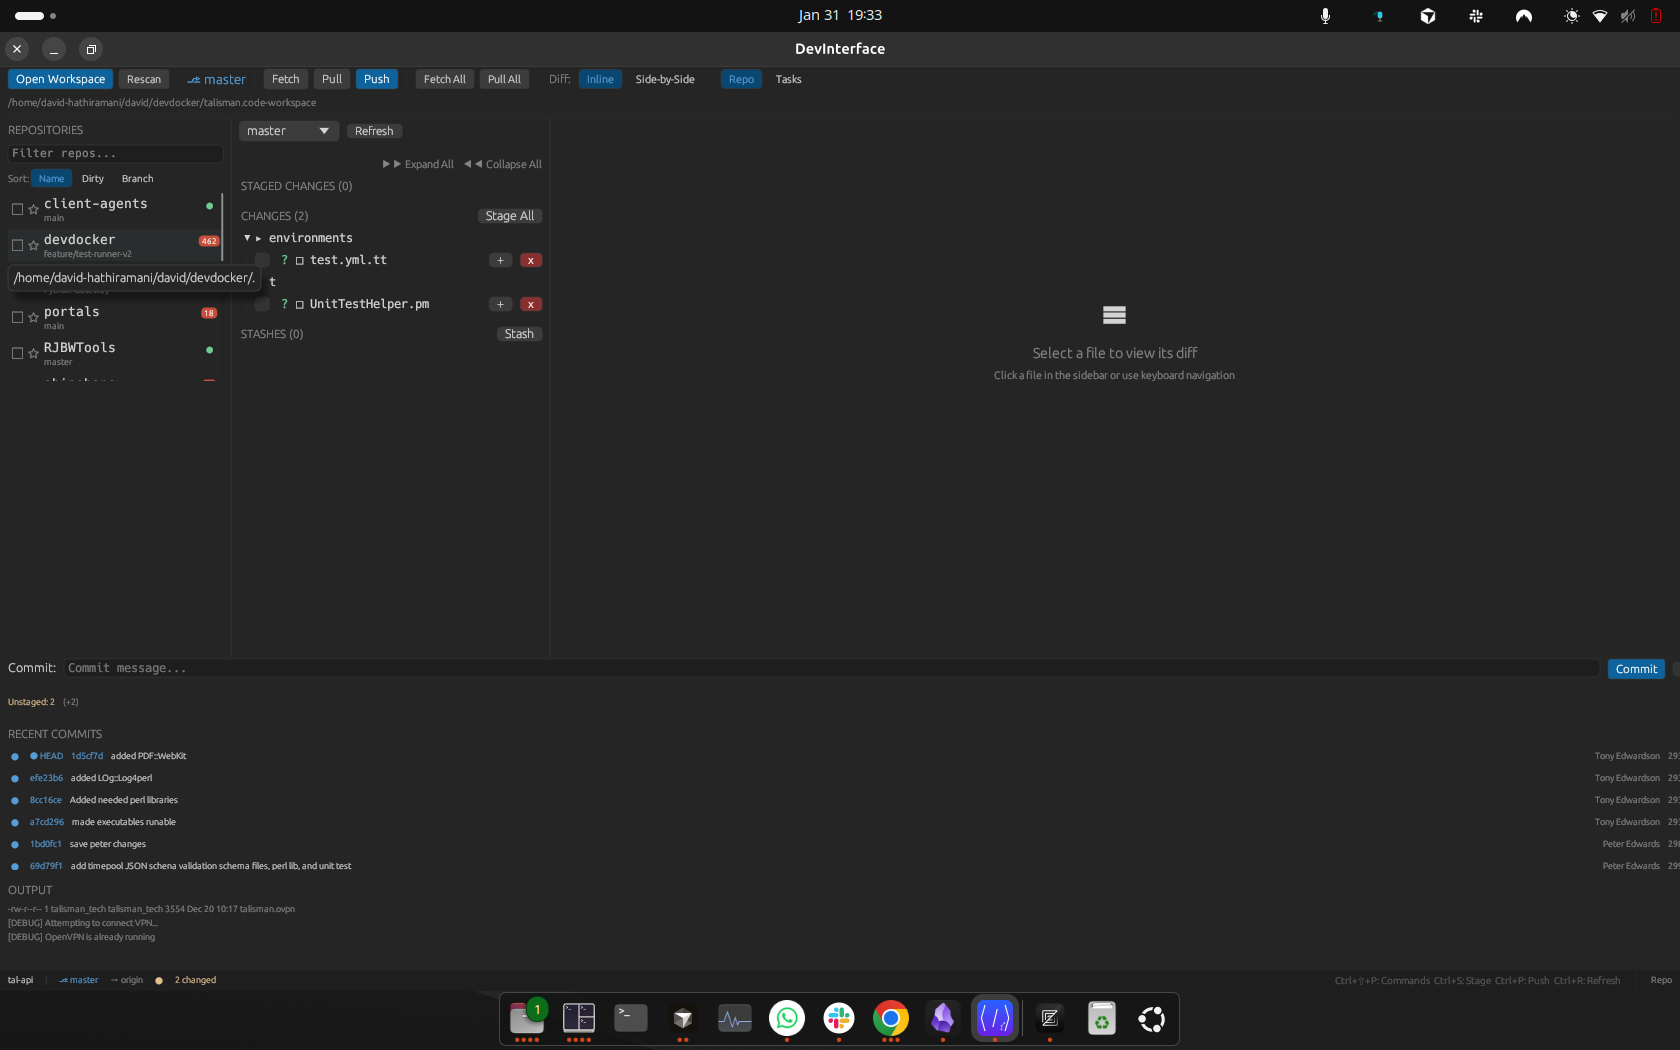 A full-window capture. Some older captures show
 Repo/Tasks and Open Workspace; current source labels the main view tabs COMMAND, CONTROL, and CHRONICLE.
The main window is arranged as:
| Area | What it does |
|---|---|
| Top toolbar | Opens Summon, shows the workspace, navigates back/forward, switches Command/Control/Chronicle, shows notifications, Git activity, branch state, cloud/update/LOC/compute chips, and window controls. |
| Left sidebar | Shows Grunts/Rituals/Peruse/Scrolls in Command, repositories and changed files in Control, and history navigation in Chronicle. |
| Center pane | Shows terminals, file viewers, diffs, commit/history viewers, and empty states. |
| Thy Quill | Persistent notepad on the right. |
| Bottom status bar | Shows workspace/repo status and, in some builds, shortcut hints. |
| Summon/action picker | The agent launcher. If no terminal is open, the center empty state also offers Summon. |
If your desktop environment shows an OS dock over the app, that dock is outside Code Overlord. Code Overlord's in-app launcher is Summon.
For a control-by-control breakdown of every toolbar button and status chip, and the full keyboard-shortcut tables, see Toolbar and Navigation.
Tip: Press
Ctrl/Cmd+Shift+/at any time to open the Spellbook, the in-app keyboard-shortcut reference with a search box.
Initial Configuration
1. Open A Focused Workspace
Use a .code-workspace file for multi-repo work, tasks, scheduled runs, and consistent agent context. Keep the workspace scoped to active project folders so file indexing and Git scans stay fast.
2. Sign In
Sign in before using:
- Phone Sync and mobile pairing.
- Cloud recents and cloud notepad sync.
- Download links for Android and iPhone onboarding.
- Skyforge remote compute features.
3. Verify Agents
Code Overlord includes built-in definitions for agents such as Claude Code, Codex, Antigravity CLI, Cursor, and Minions. If an agent command is missing, open the Armoury/settings area and check the agent setup rather than editing workspace files by hand.
Tip: Grunts are the raw agent CLIs — Claude Code, Codex, Antigravity CLI, and Cursor. Minions are the built-in specialists shipped with the app: The Dark Lord, Product Pete, Techie Tom, Coder Carl, Snapper Sam, Designer Dave, Marketing Maya, and Enforcer Eve. Start a Grunt for direct execution; summon a Minion when you want a shaped role and workflow. See Agents and Tasks.
Agent config is stored in:
- Linux:
~/.config/code-overlord/config.json - macOS:
~/Library/Application Support/code-overlord/config.json - Windows:
%APPDATA%\code-overlord\config.json
4. Configure Alliances And Integrations
Open the Armoury and go to Alliances or the relevant integration settings to connect accounts. Common first connections are Google, Slack, Jira, GitHub, OTRS/Znuny, and browser automation.
Browser automation uses Playwright Chromium. If Chromium is not installed, the integrations UI shows Install [Chromium]; if Node.js is missing it shows Install [Node.js] first - [Chromium] is summoned through it.
Integration config is stored in:
- Linux:
~/.config/mcp-orchestrator/config.toml - macOS:
~/Library/Application Support/mcp-orchestrator/config.toml - Windows:
%APPDATA%\mcp-orchestrator\config.toml
5. Know Where App State Lives
Main app config directory:
- Linux:
~/.config/code-overlord - macOS:
~/Library/Application Support/code-overlord - Windows:
%APPDATA%\code-overlord
Common files include:
settings.json: UI and behavior preferences.mcp_servers.json: MCP server registry.onboarding_state.json: first-run onboarding state. Theonboarding_seenfield gates the onboarding modal.
Troubleshooting First Launch
| Problem | What to try |
|---|---|
| No workspace opens | Use OPEN STRONGHOLD, drag in a folder, or drag in a .code-workspace file. If a folder has several workspace files, choose one in Select Workspace. |
| Folder opens the wrong workspace | Check the folder for multiple .code-workspace files and reopen the intended one directly. |
| Git controls are empty | Confirm the workspace folder contains Git repositories and that Git is installed. Use Control/branch tools to refresh repository status. |
| Browser automation is unavailable | Install Node.js, then use Install [Chromium] in integration settings. |
| Phone Sync controls are disabled | Sign in first, then reopen onboarding or the mobile sync flow. |
| Onboarding will not reappear | Use Replay onboarding from Armoury/About if available. The app stores the show-once state in onboarding_state.json. |